
From helping restaurants of all sizes thrive, to enabling diners to find and book the perfect table for every occasion, OpenTable’s story is one of human connection—among diners and restaurants, and between restaurants and their communities, bringing together people and the restaurants they love in the moments that matter.
This is where Repuso come in. Repuso can monitor your OpenTable page (and other social channels), collect your reviews and showcase them on your website in several ways that your visitors will love!
Lets embed OpenTable reviews widget on your site
- If you already have a Repuso account - login here. If not - click here to sign up.
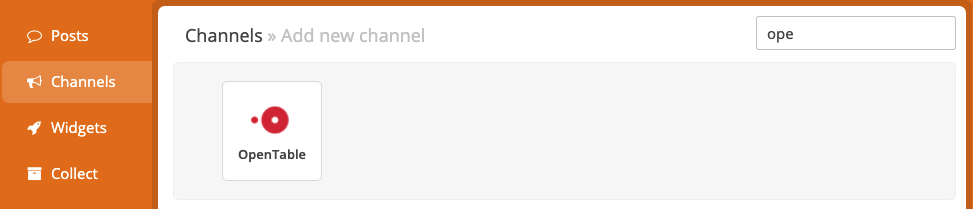
- Go to “Channels”, click on “Add channel” button and find “OpenTable” channel

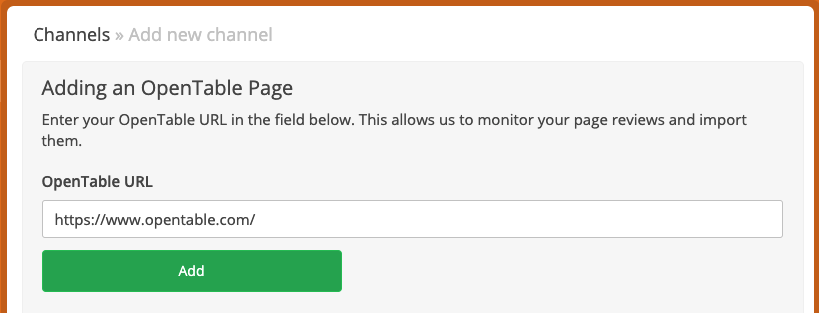
- Click on OpenTable and enter your listing URL
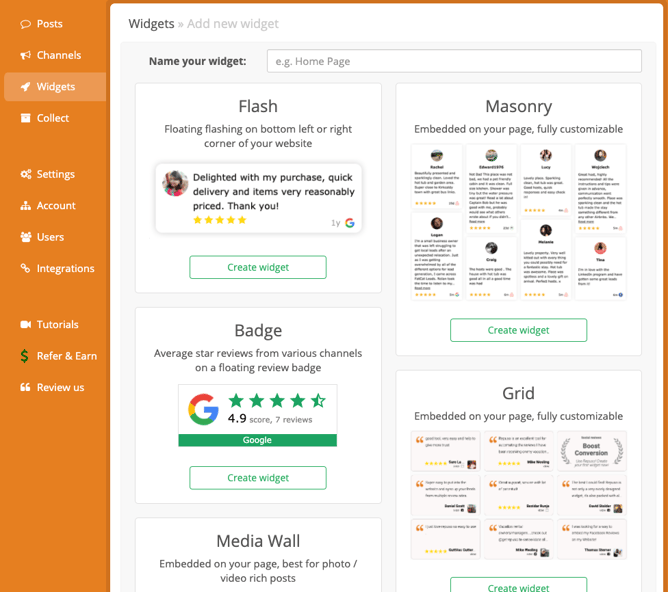
- Next, you’ll need to create a new widget. A widget is a way to implement the reviews on your website. You can create multiple and different widgets for different sections on your website.
- Click on “Widgets” and then “Add widget” button

- Choose the widget of your choice and give it a description that you’ll recognize later
- This is the code that you’ll need to implement on your website (are you using WordPress? Use the Repuso WordPress plugin for easy implementation)
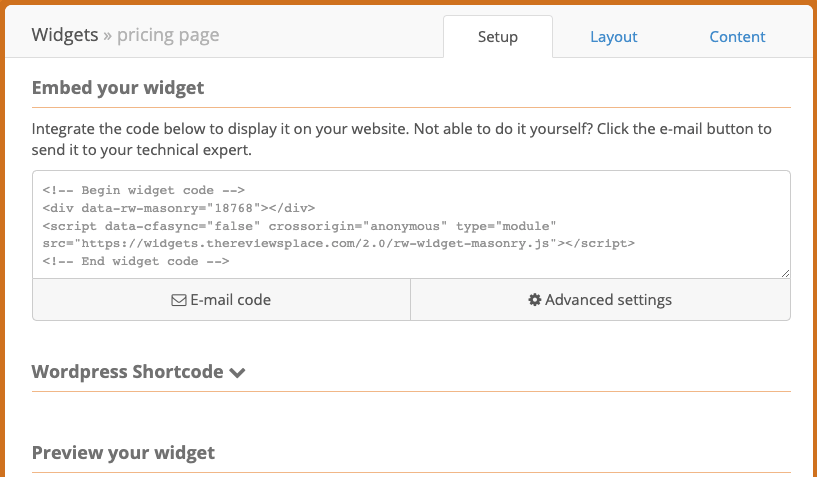
- You can customize the look and feel of the widget to match to your website (the “Layout” tab) along with selective reviews (“Content” tab).
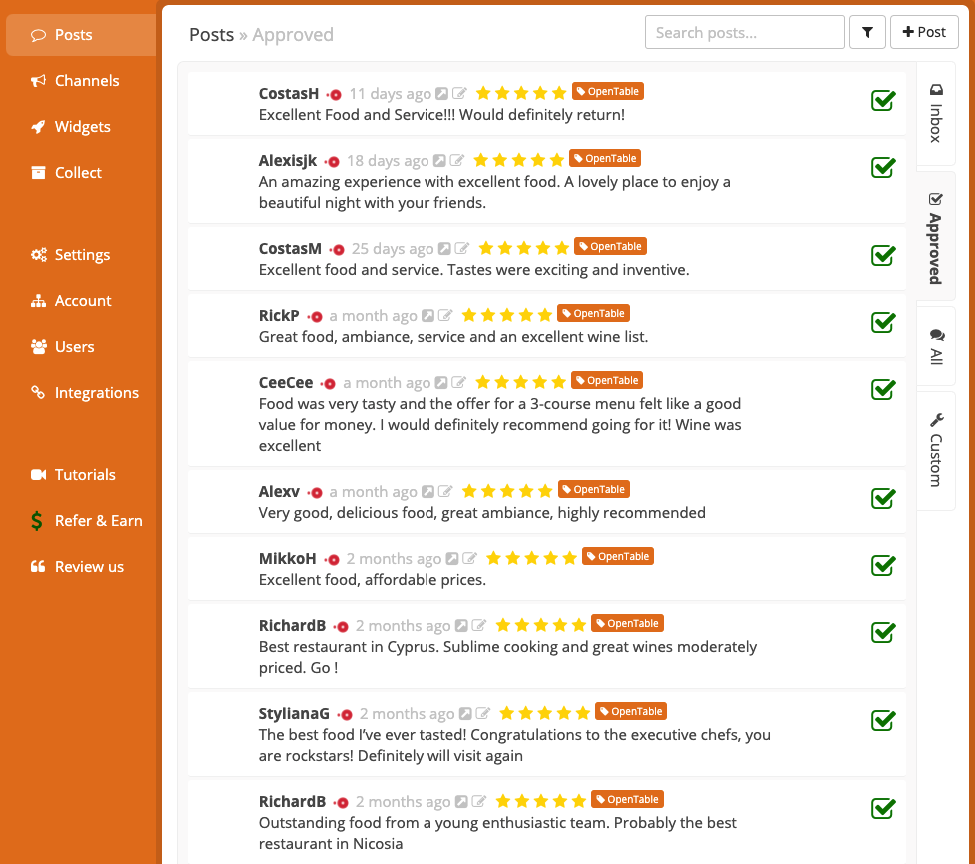
- Each review collected from your OpenTable account will appear on your “Inbox”. It’ll appear on your widget only after you approve it
- That’s it! Your widget will always be up to date with the latest reviews.

If you have any feedback or other comments, please let us know.